Quick Strips Tutorial
I had a bunch of leftover little scraps of the new Palette o Prints designer paper and wanted to put them to use. So here is the project I came up with:
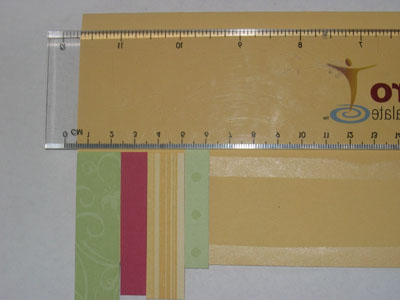
1. Place a ruler at the top of where you want your border of strips. Run a line of SNAIL (monoadhesive) just below the ruler and at the very bottom of the page. Start lining up your scraps in a pleasing pattern. Let them hang off the bottom and the last edge.
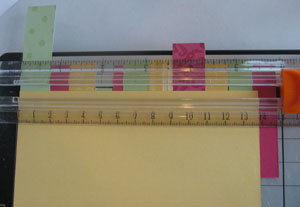
2. Using your personal paper cutter, trim the bottom and side.
Oh boy, some more scraps for a tiny border!
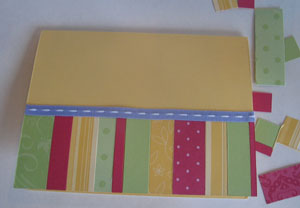
3. Add a strip of ribbon along the top edge of the strips.
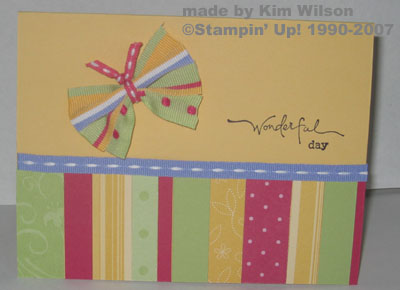
The final card. Stamps: Warm Wishes and Everday Flexible Phrases – both on sale this month! Instructions for the butterfly are below.
6 Comments »
RSS feed for comments on this post.
Leave a comment
Line and paragraph breaks automatic, e-mail address never displayed, HTML allowed: <a href="" title=""> <abbr title=""> <acronym title=""> <b> <blockquote cite=""> <cite> <code> <del datetime=""> <em> <i> <q cite=""> <s> <strike> <strong>
April 26th, 2007 @ 11:41 am
Terrific…thanks for writing this up! I will use this idea for sure!
April 26th, 2007 @ 1:53 pm
Cute idea! I love ideas to use scraps.
April 26th, 2007 @ 3:47 pm
I always have a ton of scraps – great idea!!!
April 27th, 2007 @ 8:12 am
I love this idea! Thank you so much for the tutorial!
Also, I have to tag you! Now you have to tag 5 bloggers, and leave comments on their sites! That’s it!
April 27th, 2007 @ 4:53 pm
Great idea and you can be sure I am going to use it!! I have a lot of scraps left from my Cricut paper and I just couldn’t toss them out. You have given them a new life!! Thanks!!
April 28th, 2007 @ 12:22 am
Awesome! I love using up scraps! And boy am I a scrap-hoarder…