My Digital Studio – Part 3 – create your own
Now that you have downloaded the MDS Express software and played with the Sweet Details photobook, try out a few more features. Open a new project, Photobooks and Pages, 8 1/2 x 11, Create Your Own. Let’s try making a page – add a background paper. Then add a square punch. If you elongate the punch, it makes a strip. Place your strip on the left side of the page. Fill with Kiwi Kiss cardstock. Add a few daisy punches. Fill each punch with a different designer paper. Add a couple photo boxes, pull in some photos. Add a few dotted circles from the Sweet Details stamp set and move it behind the photos (change object layer icon). Add a couple text boxes, add your text and you are done. You could also add some mats and shadows to add more depth to the photos and other elements. And I forgot that stitching, staples and ribbons are also included in MDS Express.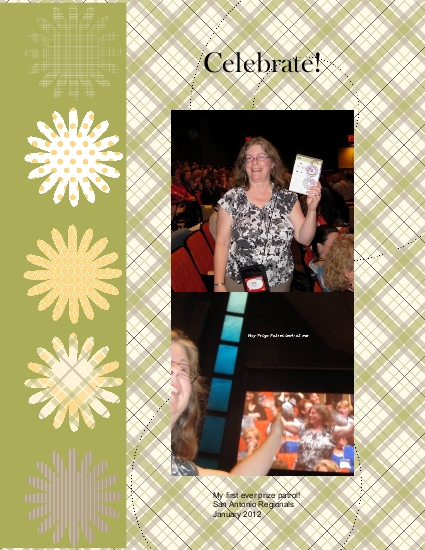
Next let’s make our own custom background paper. Add a blank page. Add a background paper. Go to the Sweet Details stamp set and add some black daisies and dotted circles. You can resize any of the elements by dragging a side or corner. Most of the MDS stamp sets are created very large, because it is easy to shrink them, but harder to enlarge because they pixilate.

Let’s add another blank page and make some elements for cardmaking. The polkadot background will look good with the black daisies. And then let’s add some text boxes and greetings. If you make a box around the daisy and sentiment, you can “Group” them (under the Arrange function) and then copy and paste as many as you like on the page. I like to cut these apart and mount on my own colored cardstock to save on printer ink. Be sure to use paper especially made for digital printing – it makes a big difference. Or you can make your complete cards under the “cards and tags” option and send them to the SU print service for a really professional look.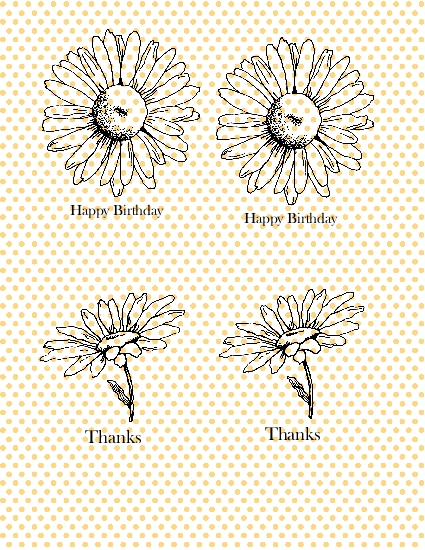
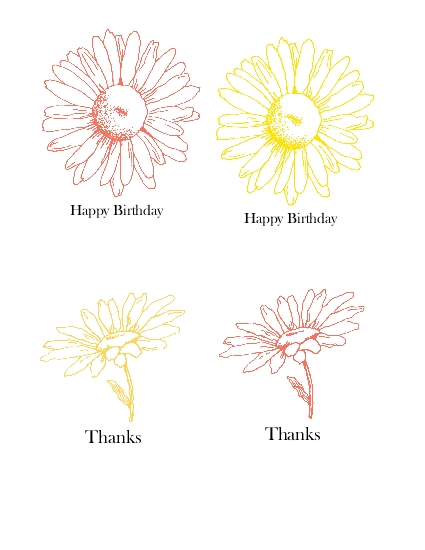
Now this time, add a duplicate page, remove the background paper and change the color of the stamps. Next, print off some of your pages and see what you can make with them.
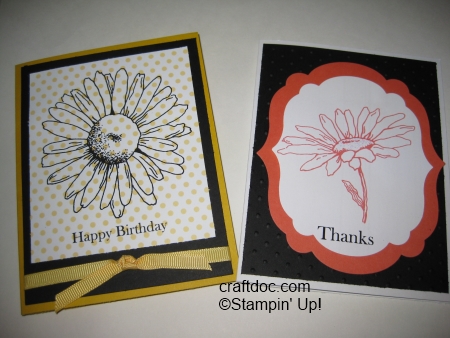
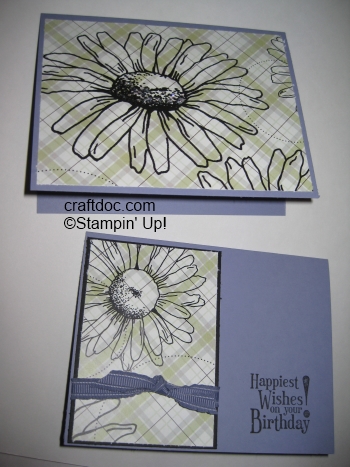
Here’s some quick hybrid cards I made from the pages I printed. My Digital Studio is an easy way to make multiples of cards. These mainly involve simple layering. I did cut out one of the images with the Labels Edgelit. Some ribbon and dazzling details to the flower centers give a little more dimension to a couple of the cards.
No Comments »
No comments yet.
RSS feed for comments on this post.
Leave a comment
Line and paragraph breaks automatic, e-mail address never displayed, HTML allowed: <a href="" title=""> <abbr title=""> <acronym title=""> <b> <blockquote cite=""> <cite> <code> <del datetime=""> <em> <i> <q cite=""> <s> <strike> <strong>