Star Card / Ornament / Tag Tutorial
Merry Christmas!
I promised to post directions for the star card/ornament that we made at the last class. I found this idea originally on splitcoaststampers. It’s quick and easy to make (if you have a scoring tool), and you can embellish it to your heart’s content to make into an ornament or tag.
The bottom one is our star card. You don’t want to embellish it too much if you want the recipient to open it. We just added a silver glimmer paper snowflake.
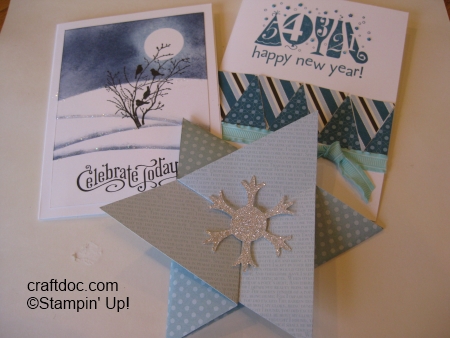
Here is the ornament version I made.

1. Cut a 12×12 piece of designer paper to 8 3/4 by 10″
2. Make a pencil mark at the center (at 5″).
3. Cut from the pencil mark to each corner to form an equilateral triangle. This is easy to do with your personal paper trimmer. Have a mentioned that the new SU trimmer is awesome! (You could make larger or smaller stars by adjusting the measurements and score lines. Just make the first fold to the center of the opposite side.)
4. Place in your Simply Scored scoring tool and move out 1/16″ from the wall. Score at 4 3/8 and 5 7/8″. You can play with the score lines so they meet at the center of each side – this will make crisp corners when you fold. Fold the centermost score towards the center, and then the other fold back.
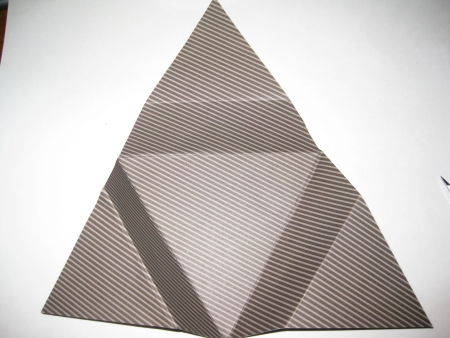
5. Fold the 3 sides in, one after the other, tucking in the last corner, just like you would fold a box.

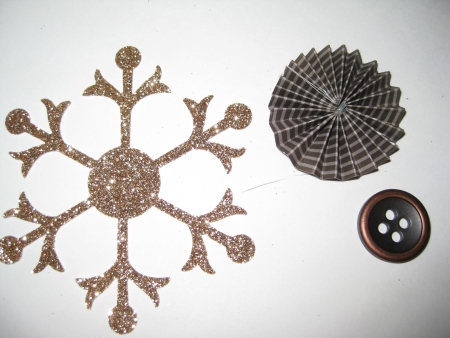
6. Embellish! Leave the sides open if you want to open as a card.
I used a 1″ x 12″ strip for the rosette.
Here’s another one.

No Comments »
No comments yet.
RSS feed for comments on this post.
Leave a comment
Line and paragraph breaks automatic, e-mail address never displayed, HTML allowed: <a href="" title=""> <abbr title=""> <acronym title=""> <b> <blockquote cite=""> <cite> <code> <del datetime=""> <em> <i> <q cite=""> <s> <strike> <strong>