Eclipse Card Tutorial
The 3D Eclipse card is the hot technique right now. I jumped on the bandwagon with a few Stampin’ Up designs of my own. I’ll share instructions, important tips and a fun list of words to use later in the post. This technique is very easy and very addicting I might add!
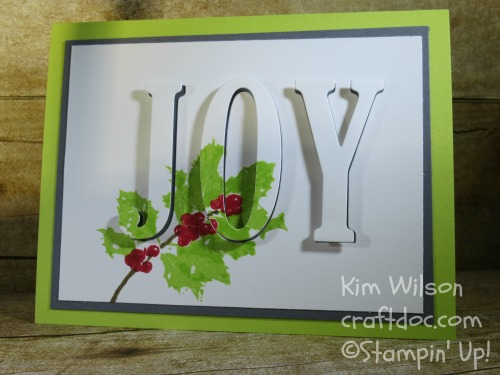
First up was JOY, using the Stampin’ Up “Good Tidings” stmp set and Lemon Lime Twist. This stamp set is not for the faint of heart. It has 6 stamps to make the main image! I decided to use an easier stamp set for my upcoming class with this technique (will show you next week).
Next I wanted to try a home decor piece and a longer word.
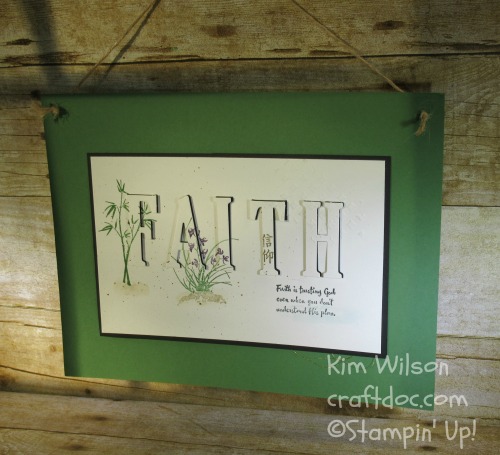
My back mat is a full 8-1/2 x 11 piece of Garden Green Cardstock. I used Shimmery White Cardstock because I wanted to add some subtle watercoloring (ink and aquapainter).

I also added some speckles with an aquapainter, embossing paste over the “H” and a little gold thread under the right bottom corner. The Jute Twine from the Holiday Catalog makes the perfect hanger. I gold embossed the asian character “faith”.
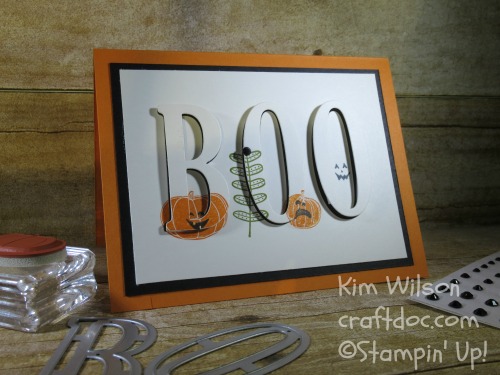
And lastly (for today at least) I’ll show you how to do the eclipse technique with this cute BOO card and the Pick a Pumpkin stamp set.
TIPS:
*Any die cuts will do for this technique but the Large Letters Framelits Dies are ideal.
*To pop up the letters, the Foam Adhesive Strips are best because they are so thick. I cut off a section at 1-1/2 inches and that was easy to use.
*You must layer on top of dark cardstock to get the shadow effect – Basic Black is ideal. And speaking of Basic Black, if you’ve ever bought cheap cardstock from the local craft store, there is absolutely no comparison (speaking from experience)!
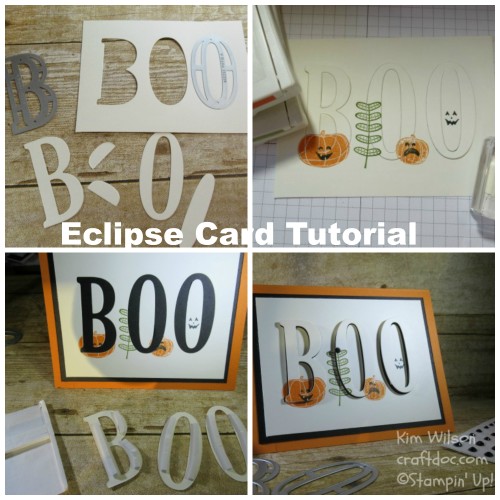
TUTORIAL: (Click on the photo to enlarge)
- Die cut the letters from a 4-3/4 x 3-1/2″ piece of Very Vanilla Cardstock. (Use a larger piece if you want to use more letters). Save the insides of the letters! Tip: Use a ruler or chipboard guide at the bottom to line up the letters.
- Insert your letters – you can adhere the inside pieces now to the black 5″ x 3-3/4″ panel or later, but NOT the letters themselves. Stamp images covering the bottom sections of some of the letters. Press hard so you don’t get halos from the gaps. Note: It’s easier to stamp first and then cut – but then the placement will be more potluck!
- Pick your letters back out and add pieces of foam adhesive to the backs. Adhere into the spaces. And that’s it! You can experiment with other diecuts, use Designer Series Paper or add more stamping. I love this clean and simple layout where the letters are the focal point. I did add a black rhinestone to the top of the leaf for a quick embellishment.
LIST OF FUN WORDS: (collected from demonstrator friends)
To use more than 5 letters – such as a name, change your card dimensions to fit a business sized envelope.
fall, hey, woof, meow, 1st, Love, Live, Grin, Grow, Hope, Sail, Snow, hello, peace, joy, noel, dad, mom, hello, hugs, smile, baby, be, big, bold, boo, cozy. dude, eat, fine, fly, fun, glam, glow, halo, hero, hi, home, hop, i heart u, if, jump, kiss, life, like, LOL, mail, moon, star, now, oh, ok, oops, ooh, play, pow, roll, sigh, sing, sun, surf, talk, time, try, wild, wine, wish, yay! yes, you, yum, zoom, ROCK
I have some specials going on right now to celebrate my 19th anniversary with Stampin’ Up!
Purchase over $40 at my online shop and I’ll send you 19 hand stamped cards from my vast collection of card samples! There’s also a special on my facebook page for some free bundles and stamp sets.
You can click on any of the products below to see more details.
I hope you enjoy making eclipse cards as much as I am!
Happy crafting,
Kim Wilson
Product List


No Comments »
No comments yet.
RSS feed for comments on this post.
Leave a comment
Line and paragraph breaks automatic, e-mail address never displayed, HTML allowed: <a href="" title=""> <abbr title=""> <acronym title=""> <b> <blockquote cite=""> <cite> <code> <del datetime=""> <em> <i> <q cite=""> <s> <strike> <strong>